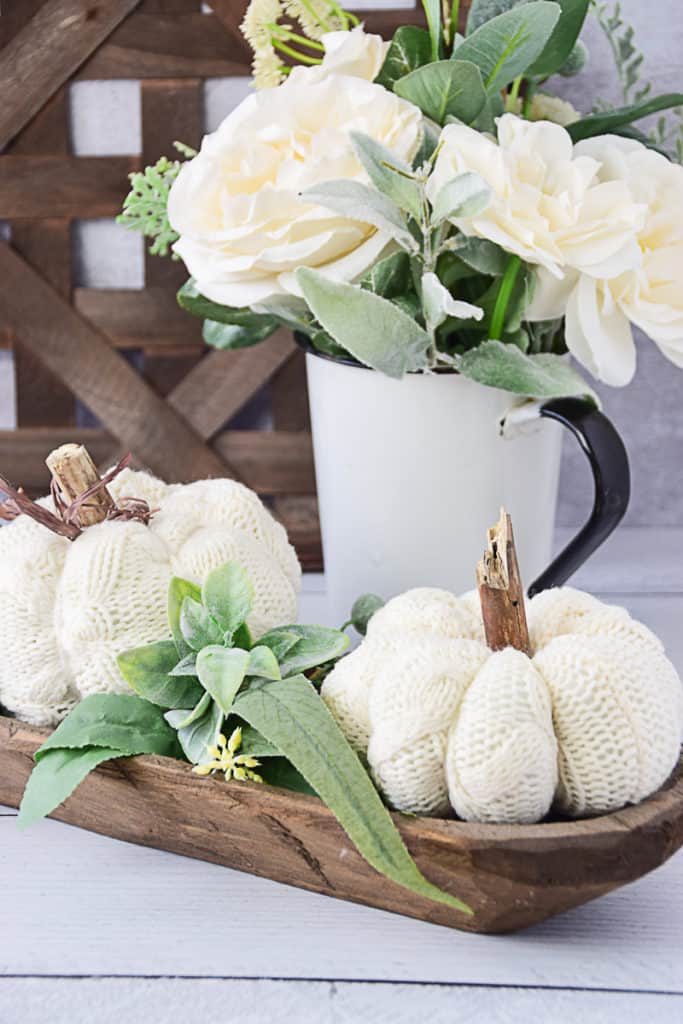
Fabric Sweater Sleeve Pumpkins
Repurpose old sweaters into Farmhouse Fabric Pumpkins. Perfect for fall harvest and autumn home decor. Make your own pumpkin patch, with just a few items and very basic sewing skills
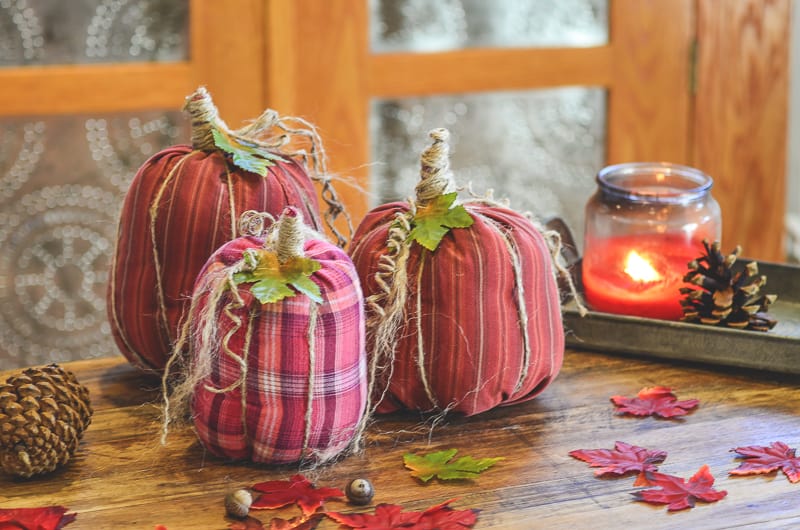
I love creating easy fall decor items around this time of the year, and a few year ago, I made a bunch of No-Sew Shirt Sleeve Pumpkins. I still love those No-Sew Pumpkins, but this year I wanted to make some pumpkins that are a little more neutral in color, and felt like this was the perfect time to play around with a different technique.
These stuffed fabric pumpkins I have for you today are constructed with very basic sewing skills. In fact, the only stitch you will need to do is a running stitch, making this a great project for beginner stitchers and kids. If you don’t want to use a needle and thread, you can totally make these following the No Sew Pumpkin Tutorial and use rubberbands.
Decorating with Pumpkins in Farmhouse Style
These fabric pumpkins have a great farmhouse feel to them. The texture and coziness of the sweater fit perfectly into farmhouse style, but to really capture the farmhouse feel, pick sweaters in a neutral color palette with soft, muted shades to make your pumpkins. Whites, greys, and greens, and even soft shades of teal are all on-trend this year.
How to Make Sweater Sleeve Pumpkins
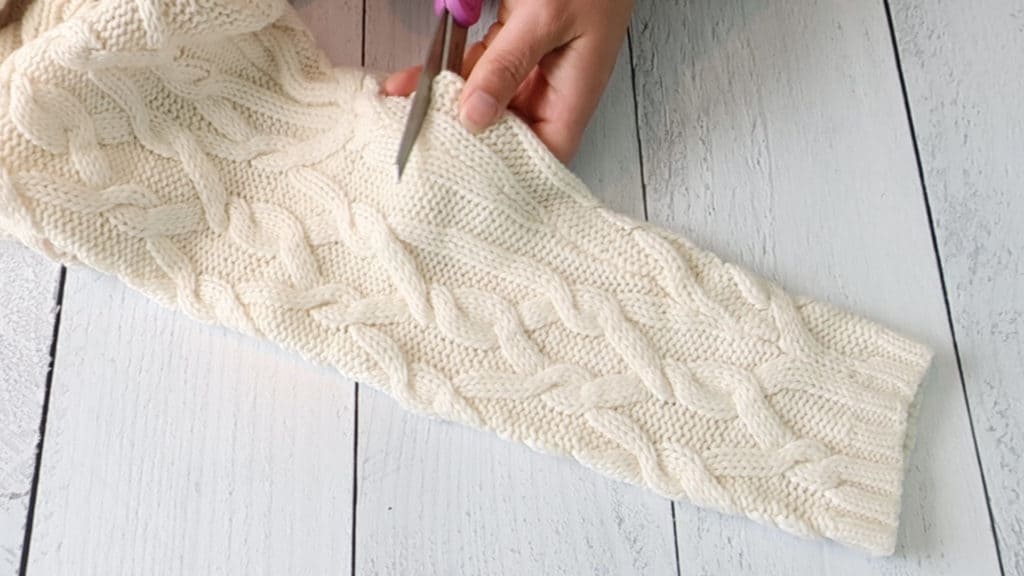
- Find an old long sleeve sweater that you think would make a cute pumpkin. I choose a chunky white cable knit sweater at Goodwill for $4.
- Cut a section of the shirt sleeve so that it is straight on both ends. I find a 6 1/2 inch section works great. One end will be wider than the other.
- Turn the sleeve inside out.
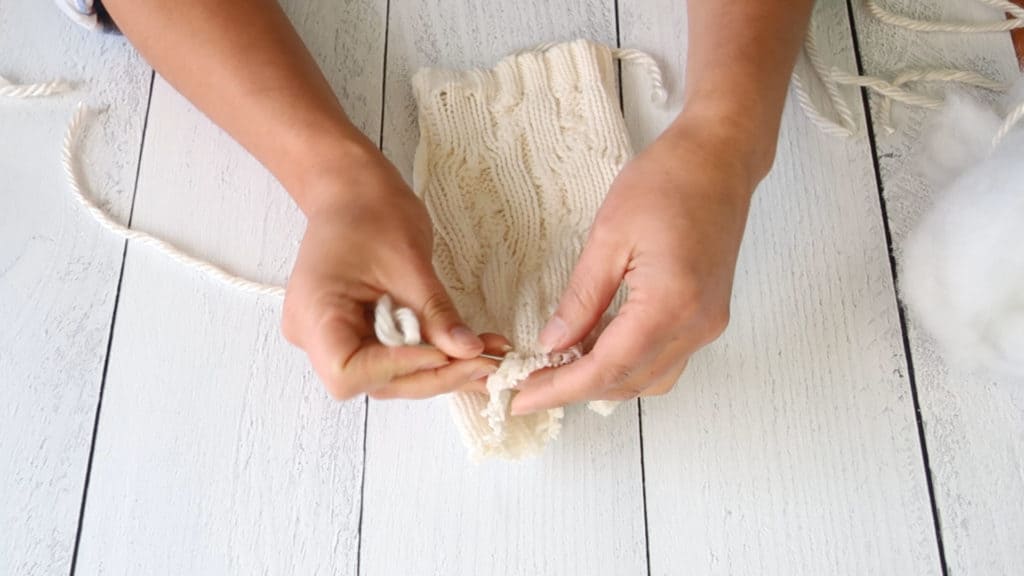
- Do a basic running stitch about 1/2 and inch from the cut edge.
- Pull the yarn tight to gather the sweater sleeve and close together the first end. Knot the yarn and trim any long tails.
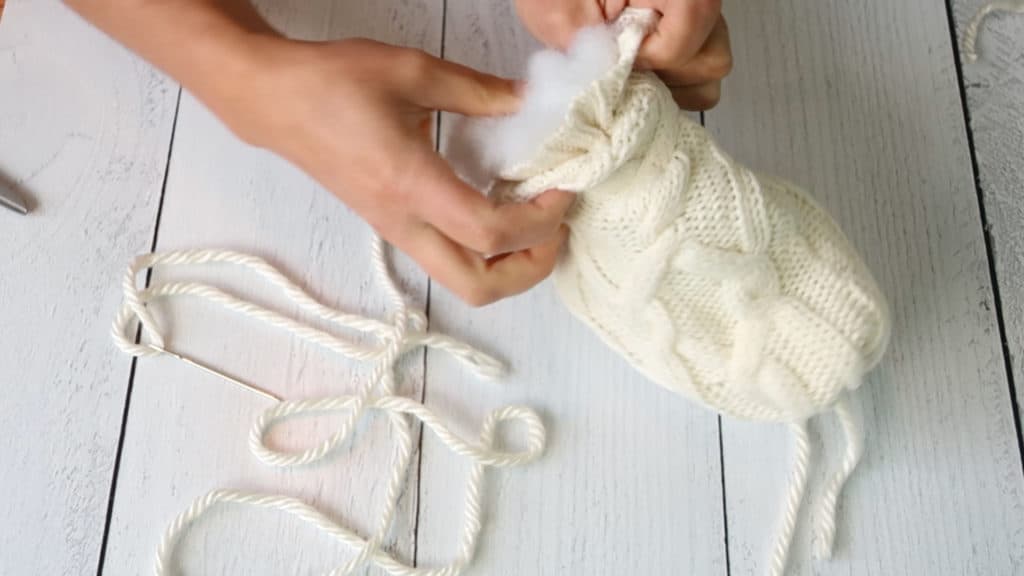
- Turn the sweater sleeve right side out.
- Stuff the sleeve with fiberfill stuffing to almost fill the sleeve. The sweater sleeve with stretch when you stuff it.
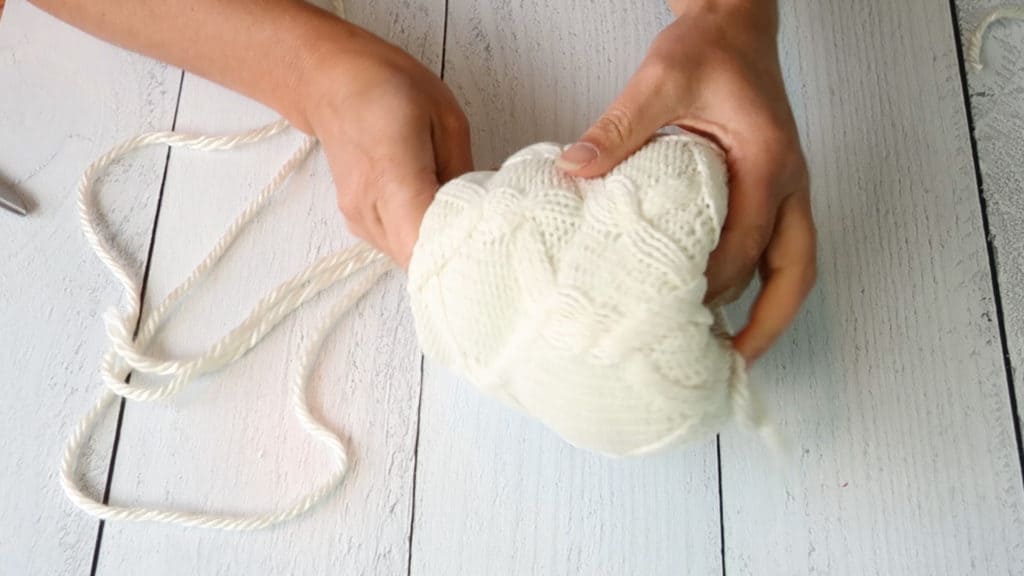
- Cut a long piece of yarn to close the other end of the pumpkin and create the pumpkin ribs. I used about a 48- inch piece of yarn for this.
- With the long piece of yarn, repeat the simple running stitch around the top edge, pulling the two ends tight to close the opening. Knot to secure, but do not trim, we will create the ribs with the remaining yarn, and it needs to be anchored securely.
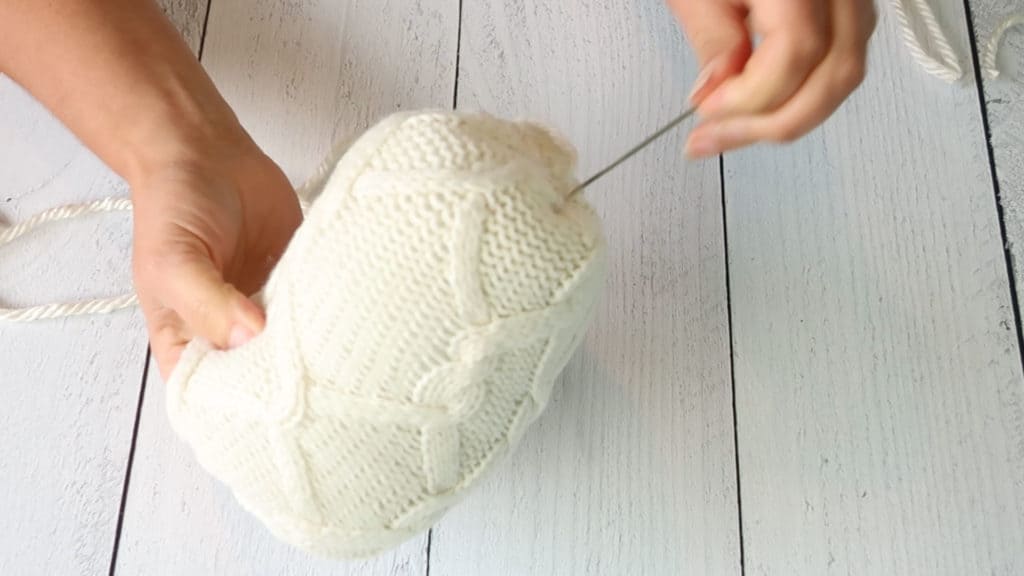
- With the same piece of yarn that just closed the top opening of the sleeve, use the needle poke all the way through the pumpkin from the bottom center gathered spot to the top of the pumpkin.
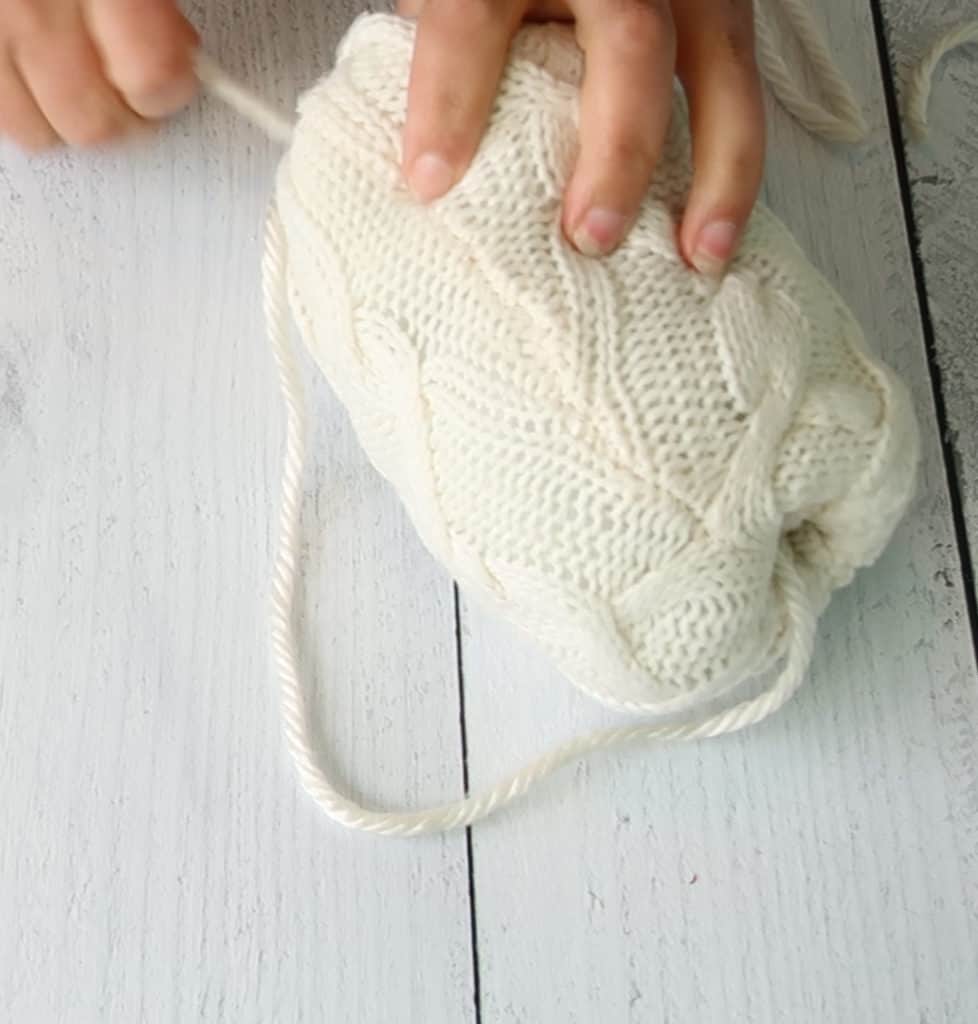
- Continue creating ribs by working around the pumpkin, stitching all the way through the pumpkin, from top to bottom, until you have as many ribs as you’d like your pumpkin to have.
- Finish off your rib stitching by knotting the yarn and trimming any long tails
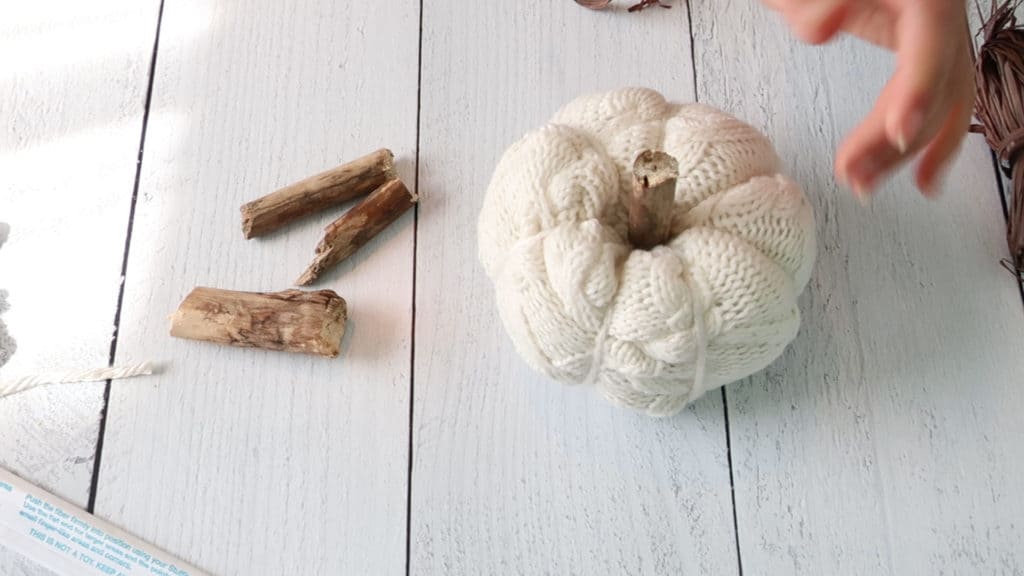
- Choose which end you like better for the top, and then hot glue a piece stick as a stem.
How to Make Stems for Fabric Pumpkins
Some of the best stems for fabric pumpkins have a rustic natural look. For my sweater pumpkins, I found a couple of twigs and sticks in the yard that I just trimmed with a hand saw. The twigs I used seemed to be on the ground from a while and were pretty dry, and attached to the pumpkin very easily with a hot glue gun. If you’d like some other ideas of stems here are a few I have seen and thought looked cute:
- Cinnamon Sticks
- Driftwood
- Aged Twigs
- Natural colored rope
- Dried Pumpkin stems
- Wine Corks
Tips for Making Sweater Sleeve Pumpkins
- You can make 4 small sized pumpkins from 1 ladies long sleeve sweater.
- The height of your sleeve is usually shrunk by about half once you start creating the ribs, but this depends on how tightly you stitch the ribs.
- The top and bottom of the sweater sleeve are closed almost identically, but with one end you will want to use a long piece of yarn. The running stitch used to close the bottom of the pumpkin will also act as an anchor the structural ribbing stitches.
- A long needle crochet or embroidery needle is super helpful as you will need to stitch up though the pumpkin to create the pumpkin ribs.

Fabric Sweater Sleeve Pumpkins
Equipment
- Scissors
- Hot glue gun & glue sticks
- Large crochet or embroidery needle
Ingredients
- Fiberfill stuffing
- Sweater
- Twigs
- Yarn
- Raffia
Instructions
- Cut off 6 1/2 inches of the sweater sleeve.
- Turn the right sides in, so the shirt sleeve is inside out, and do a basic running stitch about 1/2 and inch from the cut edge.
- Pull the yarn tight to gather the sweater sleeve and close together the first end. Knot the yarn and trim any long tails. We will refer to this end as the bottom moving forward.
- Turn the sweater sleeve right side out.
- Stuff the sleeve with fiberfill stuffing to almost fill the sleeve. The sweater sleeve with stretch when you stuff it.
- Cut a long piece of yarn to close the other end of the pumpkin and create the pumpkin ribs. I used about a 48- inch piece of yarn for this.
- With the long piece of yarn, repeat the simple running stitch around the top edge, pulling the two ends tight to close the opening. Knot to secure, but do not trim, we will create the ribs with the remaining yarn, and it needs to be anchored securely.
- With the same piece of yarn that just closed the top opening of the sleeve, use the needle poke all the way through the pumpkin from the bottom center gathered spot to the top of the pumpkin.
- Continue creating ribs by working around the pumpkin, stitching all the way through the pumpkin, from top to bottom, until you have as many ribs as you’d like your pumpkin to have. As you tighten the rib stitches gently, the shape of the pumpkin will begin to take form.
- Finish off your rib stitching by knotting the yarn and trimming any long tails
- Choose which end you like better for the top, and then hot glue a piece stick as a stem.
- You could also add a little natural raffia bow to simulate the fibrous vines a pumpkin often has.
Video

If you’re like me, once you get started making these cute diy fabric pumpkins, you’ll want some in every size and color! They’re perfect to give as gifts, or to decorate your own home with! I think they would even sell well at craft fairs!
I hope these Farmhouse Sweater Sleeve Fabric Pumpkins get you in the mood to fill your home with some handmade autumn touches!