10 Winter Sowing Mistakes & How To Avoid Them
Learn essential tips to avoid common pitfalls and winter sowing mistakes such as incorrect timing, unsuitable containers, and more, ensuring a thriving, healthy garden. Perfect for gardeners of all levels looking to master the art of winter sowing.

If you’re anything like me, when the hustle and bustle of the end of the holiday season comes to an end, an undeniable itch to get your hands into some dirt, nurture young plants, and start gardening creeps in. With the festivities behind us and a new year blossoming, the thought of a productive garden and blooming flowers is irresistible. Winter sowing is a gardener’s secret weapon against the cold, dark, dreary days. It’s a great way to get a head start on your garden, transforming the cold, snow-laden months into a time of growth and anticipation.
Winter sowing, like any gardening project, is as much about the journey as it is about the results. There will be successes and challenges, but each provides an opportunity for learning and growth. If you are new to winter sowing, I am going to share the most common mistakes to avoid to help make sure your winter gardening project helps you create the garden you’re dreaming of.
What is Winter Sowing?
Winter sowing is a great way to start seeds as it mimics the process many seeds undergo naturally, where they fall to the ground in autumn, endure the winter cold, and then sprout with the arrival of warmer spring temperatures. Resourceful gardeners who want to utilize Mother Nature to get a jumpstart on the growing season have adopted this method for gardening.
Winter Sowing is not a new technique, but it was popularized by Trudi Davidoff, a thrifty gardener challenged for space in her small New York State home. She did not have room for grow lights, heat mats, and seed trays, so she mimicked what happens naturally. She sowed seeds in containers in late winter and left them outdoors to germinate naturally without supplemental water or fertilizers. The technique was a success, and Trudi spread the word through her website, which is no longer available, and her Facebook group (Winter Sowers), which is very active and a great resource!
This method utilizes the natural winter conditions to simulate a cold stratification process, which some seeds require for germination. I have a more in-depth blog post but here’s how it generally works:
- Containers are filled with a few inches of potting soil, and seeds are sown. The containers are then sealed with their tops cut but left attached to create a hinged lid. Adequate ventilation holes are made, and drainage holes are added at the bottom to prevent waterlogging. This creates a mini greenhouse effect perfect for starting some types of seeds.
- The containers are placed outside during the winter, usually after the winter solstice. In colder climates, the seeds inside experience the natural freeze and thaw of winter cycles, which helps break their dormancy. This process is known as stratification. Many seeds, particularly those of perennials and cold-hardy plants, require this period of cold exposure to germinate successfully. Gardeners use transparent or semi-transparent plastic containers (like repurposed milk jugs, soda bottles, or any other plastic containers) as mini greenhouses. These containers protect the seeds from extreme weather, pests, and other outdoor elements.
- As the weather warms up in spring, the seeds begin to germinate within their protective mini greenhouses. The containers create a micro-environment that provides the right amount of moisture and warmth for the seedlings.
- Once the seedlings are strong enough they can be transplanted into the garden. Winter-sown plants are generally hardier and experience less transplant shock or challenges.
Winter sowing is particularly effective for regions like ours in Upstate New York with cold winters. It’s a cost-effective, low-maintenance way to start a garden, eliminating the need for indoor space and grow lights, with the benefit that plants grown with this method are often hardier and more acclimated to the outdoor conditions than those started indoors.

10 Winter Sowing Mistakes
For a lot of people, winter sowing is a whole new kind of seed starting. Even the most experienced gardeners can stumble upon common mistakes that can easily derail their efforts. These top ten mistakes are common issues that can come up when winter sowing. From seed selection to the appropriate containers, each decision plays a pivotal role in determining the success of your winter-sown plantings.
Avoiding these mistakes enhances the chance of your plants thriving and ensures a more enjoyable and rewarding gardening experience.
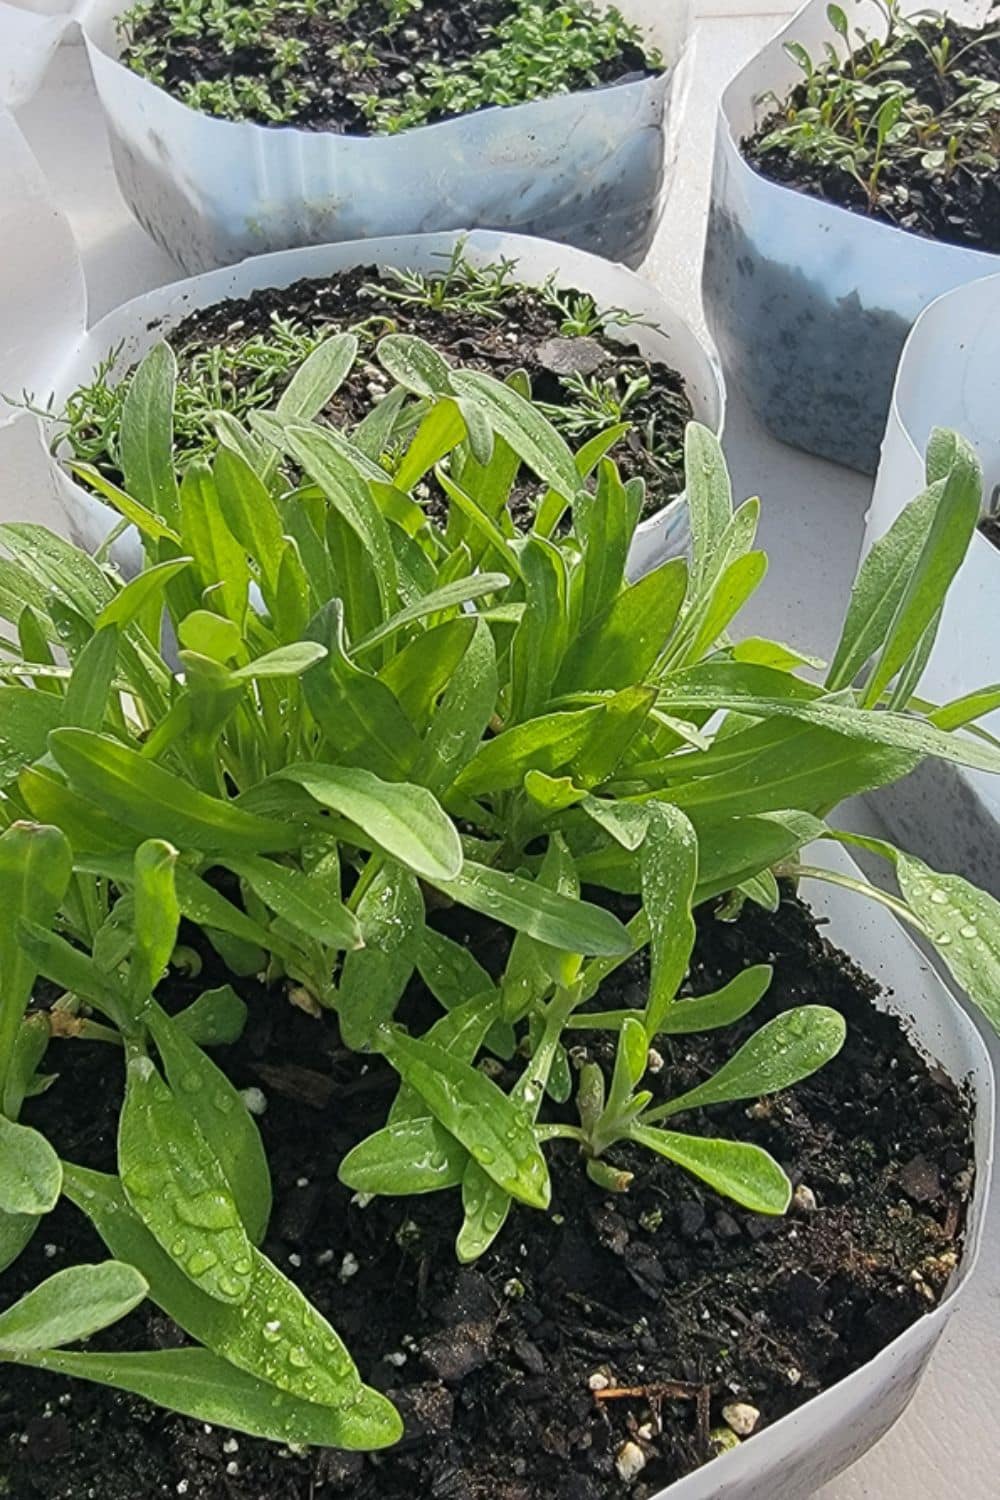
Using the Wrong Containers
People can get really creative when it comes to winter sowing containers. Ideal containers are often recycled materials like milk jugs, water jugs, or other clear plastic containers that are deep enough for root growth, allow light to pass through, and can be modified to provide ventilation and drainage. The containers must be able to withstand winter conditions. I prefer translucent containers that let sunlight in but prevent tender new growth from getting sunburnt.
Avoid containers for winter sowing that are completely airtight. Winter-sowing containers must allow air circulation, rain, and snow to get in to provide moisture and drainage and prevent mold growth. Additionally, a container that doesn’t allow light to pass through or is too shallow for the plants’ root development would not work well.
Poor Drainage
One of the critical elements in winter sowing is ensuring adequate drainage in your containers. Without proper drainage, seeds are at risk of drowning or rotting, which can drastically reduce germination rates and the overall success of your winter garden. Here’s how to ensure optimal drainage.
Before filling your container with soil and sowing, ensure your containers have enough drainage holes. Drill or poke several holes in the bottom of each container. The goal is to allow excess water to escape while retaining enough moisture for the seeds to germinate. Be generous with the number of holes – a few extra won’t hurt and can help prevent waterlogging.
I like to make about 4 to 6 small drain holes in the bottom of a gallon jug. These holes are crucial to prevent waterlogging and root rot. They should be large enough to allow excess water to drain but small enough to keep the soil from washing out.
Using the Wrong Kind of Soil
The soil you choose for winter sowing plays a pivotal role in drainage and seedlings’ health. Here’s why regular potting soil is an excellent choice:
- Light and Porous Texture: High-quality potting soil is usually light and porous. This soil type allows for better air circulation and water drainage, which is essential in preventing root rot and fungal diseases.
- Moisture Retention and Drainage Balance: Good potting soil strikes the perfect balance between moisture retention and drainage. It holds enough moisture to keep the seeds hydrated but drains excess water effectively. This balance is crucial during the freeze-thaw cycles of winter.
- Nutrient Content: Potting soils are often fortified with essential nutrients that help grow strong and healthy seedlings. Look for soil that includes a mix of compost, peat moss, perlite, or vermiculite, contributing to the soil’s texture and nutrient content.
Soil choice happens to be one of the most confusing and debatable issues for winter sowing. Everyone has their own preference, but I like Happy Frog. It is available right at my local farm and garden store, I have had good luck with it, and I can use it for later when I am transplanting vegetable seedlings. Don’t overthink it, or let it be a road block for trying winter sowing.
Not Watering Adequately at the Start
Seeds need a good amount of soil moisture to germinate. Initially, the soil should be moist when you close the container. After that, the snow and rain should provide enough moisture, but you should check occasionally, especially in a dry winter. I like to use pre-moistened potting soil to make sure my soil mix.
- Measure the Soil: Pour the dry soil into a large container or wheelbarrow. You might want to do this in batches if you’re preparing a large amount.
- Add Water: Gradually add water to the soil. Use a watering can or hose with a gentle spray setting. The key is to add the water slowly and evenly, so you don’t add too much water, and have soggy soil.
- Mix Thoroughly: Use a garden trowel, shovel, or your hands to mix the soil and water. Ensure the water is evenly distributed throughout the soil. Break up any clumps to make sure there are no dry pockets.
- Check Moisture Level: The ideal moisture level is when the soil is damp but not soggy. A general rule of thumb is when squeeze a handful of soil – it should hold together in a clump but break apart easily when you poke it. If water squeezes out, it’s too wet; if it crumbles and falls apart immediately, it’s too dry.
Choosing the Wrong Seeds
Not all seeds are suitable for winter sowing. Generally, the right type of seed is going to be native plants; hardy annuals, hardy perennials, and certain vegetables do well, but tender plants that can’t withstand frost are not suitable. Make sure to read your seed packet and look for plants described as:
- Reseeding
- Self-sowing
- Hardy seeds
- Seedlings can withstand frost
- Sow outdoors in late autumn or early winter
- Sow outdoors in early spring while frosts may still occur
- Needs pre-chilling
- Requires a period of stratification.
For specific ideas on vegetable seeds, flower seeds, and herbs that tend to do well with winter sowing, check out this blog post, Seed Selection For Winter Sowing, for the best seeds for beginner winter sower.
Neglecting to Label Containers
It’s surprisingly easy to lose track of what’s planted where in your winter sowing setup. That’s why it’s crucial to label your containers effectively. This simple step is a game-changer for organizing your garden and making planning a breeze as the season unfolds. Use paint marking pens or other UV-resistant markers to label the side of the jug for the best results. Regular sharpies might seem handy, but they tend to fade over time, leaving you with a guessing game come spring.
Overcrowding Seeds
If too many seeds are sown in a small space, it can lead to overcrowding, resulting in weaker plants. Thin out if necessary.
When too many seeds are sown close together, it leads to overcrowding, which can have several negative impacts on your seedlings:
- Competition for Resources: Crowded conditions create competition for essential resources like light, water, and nutrients. This competition can result in weaker, less vigorous plants.
- Reduced Air Circulation: Overcrowding can limit air circulation around the plants, increasing the risk of fungal diseases like mildew.
- Difficult Transplanting: Dense growth makes it harder to transplant seedlings without causing damage.
Luckily, this is easily remedied with thinning if you were a little heavy-handed with your seeding. To avoid these issues, sow seeds sparingly and evenly. If you do end up with overcrowded seedlings, thin them out by gently pulling out the weakest ones, giving the remaining plants room to grow.
Not Securing the Lids
The lids of your mini greenhouses serve several important functions. They should be secure to protect seedlings from animals and strong winds and allow for some air circulation.
- Protection from Animals and Wind: Animals can blow away or open unsecured lids, exposing your seedlings to harsh conditions and pests.
- Maintaining Environment: A secure lid helps maintain a consistent micro-environment, which is crucial for seed germination and growth.
Tips: Secure the lids with tape like duct tape, or wires, or zip ties, ensuring they’re tight enough to protect against animals and wind but can still be opened for ventilation or watering.
Ignoring Pest Control
Even in winter, pests can be an issue. Regular checks can help in early detection and control.
- Common Winter Pests: Some pests, like aphids and spider mites, can thrive in the stable conditions of a mini greenhouse. Also seeds can appear to rodents looking for a easy meal.
- Monitoring: Regularly inspect your seedlings for signs of pests. Look under leaves and along stems for any unusual spots, webbing, or insects, make sure your jugs are sealed so rodents can’t get in and eat the seeds.
- Preventive Measures: Keeping your sowing area clean and avoiding overcrowding can reduce pest issues. If pests are detected, use appropriate methods like insecticidal soap or neem oil, keeping in mind the delicate nature of young seedlings.
Not Opening the Lid On Warm Days
When the weather gets warmer, it’s a good idea to completely open the top of the container. This not only prevents the air temperature around the seedlings from becoming excessively hot but also allows a gentle breeze to pass through. The air movement plays a vital role in strengthening the plants by simulating natural outdoor conditions. Additionally, this increased airflow promotes better ventilation, crucial for healthy growth. Also, exposing the plants to the outdoor environment periodically as they grow helps prepare them for their home in the garden, once they are ready to be transplanted.
Winter sowing is a great way to get a head start on the gardening season. For more detailed information on winter sowing, check out my blog post, Get a Head Start on Spring with Winter Sowing. Avoiding these common seed-starting mistakes will increase your chances of success.