How to Make Homemade Farmer’s Cheese

There is a kind of cooking that doesn’t ask much of you. No special equipment. No long list of ingredients sourced from places you’ll never visit. Just a pot, some milk, and a little patience. Farmer’s cheese is that kind of cooking.
I came to cheesemaking by watching someone else do it first and realizing it wasn’t nearly as mysterious as I had imagined.
It was my cousin who showed me. For a few years, she kept a small herd of milk goats at her homestead. Milking was simply part of her day, as ordinary as making coffee or feeding the chickens, and that steady supply of fresh milk rarely went to waste. She made soap from it. Yogurt. And simple fresh cheeses like this one – the kind you can stir together on a Tuesday afternoon and eat for dinner that same night.
I watched her make farmer’s cheese once, standing at her kitchen counter while the kids played outside and the goats were already back in the pasture. The whole process took less time than I expected. Heat the milk. Add the vinegar. Watch it separate. Strain it. Done. She handed me a cracker spread with still-warm cheese and a few snipped chives, and that was that. I was a convert.
That afternoon comes back to me every spring, usually right around the time the grass greens up in the Finger Lakes and the dairy farms start coming back to life. There’s something about this season – the mild air, the longer evenings, the feeling that things are opening up again, that makes you want simple food. Food that takes an afternoon and rewards you generously.
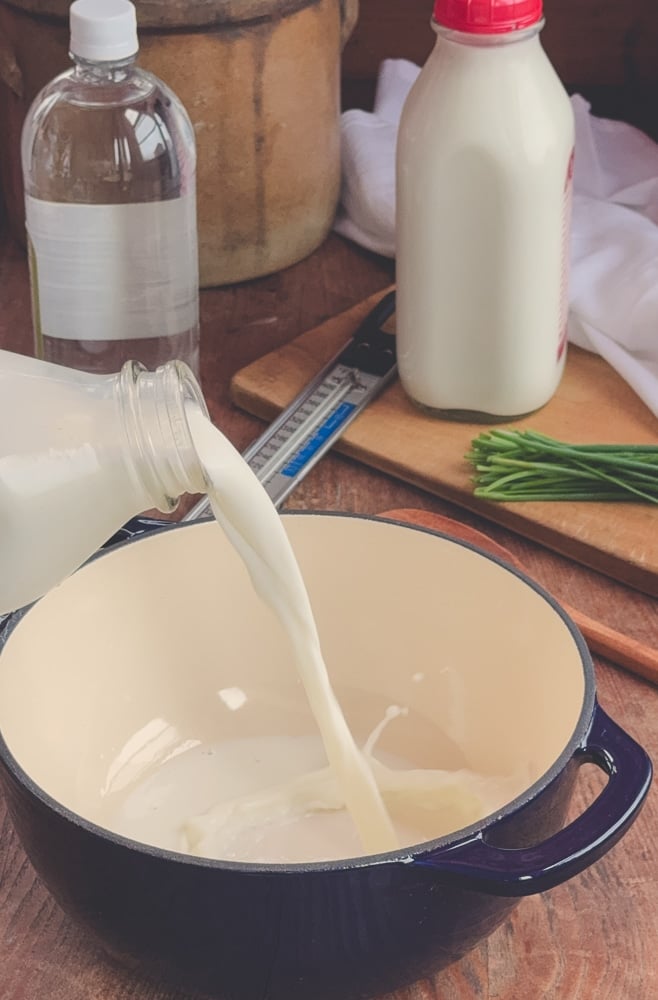
You don’t need a goat in the backyard to make this cheese. You don’t need anything more than a half-gallon of good whole milk, a splash of white vinegar, and something to strain it through. The milk you buy at the grocery store will do just fine, as long as you reach for regular pasteurized rather than ultra-pasteurized. Ultra-pasteurized milk has been heated to a higher temperature and often won’t form proper curds – something I learned the hard way – so it’s the one thing worth checking the label for before you start.
When I can, I reach for local milk. There is something noticeably different in the curds when the milk comes from a dairy you know, from cows grazing not far from where you’re standing. Pittsford Farms Dairy and Sweet Acres Creamery are my two go-to sources. The richness of good local whole milk shows up in the final cheese, and it’s worth the small effort of seeking it out.
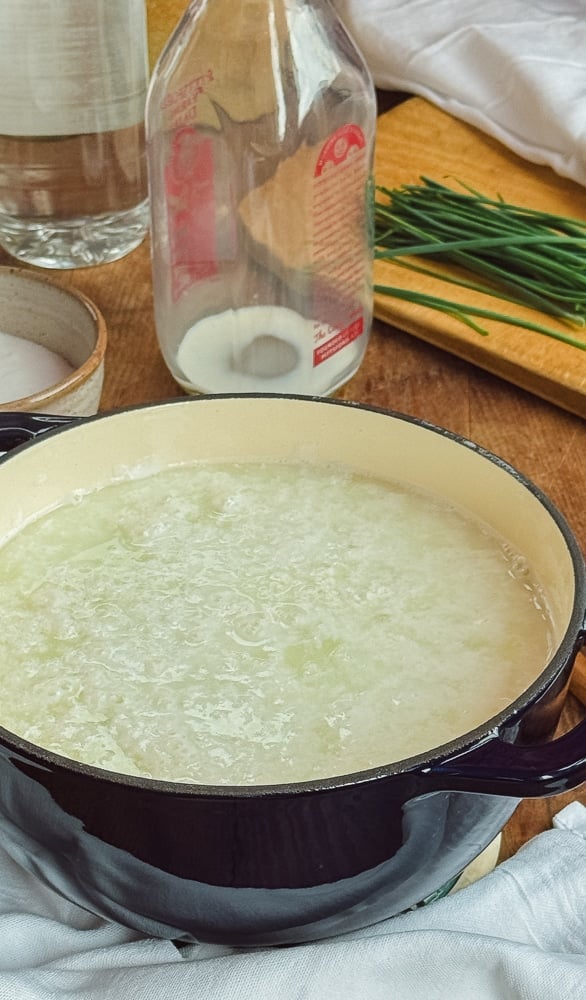
The process itself is almost intuitive. You heat the milk slowly, watching it carefully as it climbs toward temperature, mall bubbles forming at the edges, steam rising from the surface, you are watching for the faintest sense that it’s about to tip into a boil, but not quite. Then you pour in the vinegar and stir, and something happens that feels almost magical no matter how many times you’ve done it: the milk begins to separate, pulling apart into soft white curds floating in pale golden whey, right in front of you.
It never gets old, that moment.
You let it sit. You make yourself a cup of tea. You go check on the garden or the animals or whatever’s waiting for you outside. Then you come back, ladle the curds into a cheesecloth-lined colander, and let gravity do the rest.
A Note on Herbs
This is where the recipe becomes entirely your own.
In early spring, before much else is ready in the garden, I look to wild garlic chives. They come up reliably along the fence rows and the edges of things here, sharp-flavored and green, and a handful snipped into the warm curds makes a cheese that tastes unmistakably of this particular season and this particular place.
Later in spring, fresh chives from the garden are the obvious choice – mild and clean and easy. By June, when the first strawberries come in and the days feel genuinely warm, I sometimes skip the herbs altogether and serve the cheese with a spoonful of crushed berries and a drizzle of honey. It makes a lovely breakfast cheese, the kind of thing that feels like a quiet extravagance on an ordinary morning.
Deep summer calls for fresh dill – cooler somehow, with that particular green bitterness that pairs beautifully with sliced tomatoes and cold drinks on the porch. A handful of fresh basil works well too.
Farmer’s cheese welcomes whatever the garden or hedgerow has to offer. That’s one of the things I love most about it.
On Shaping
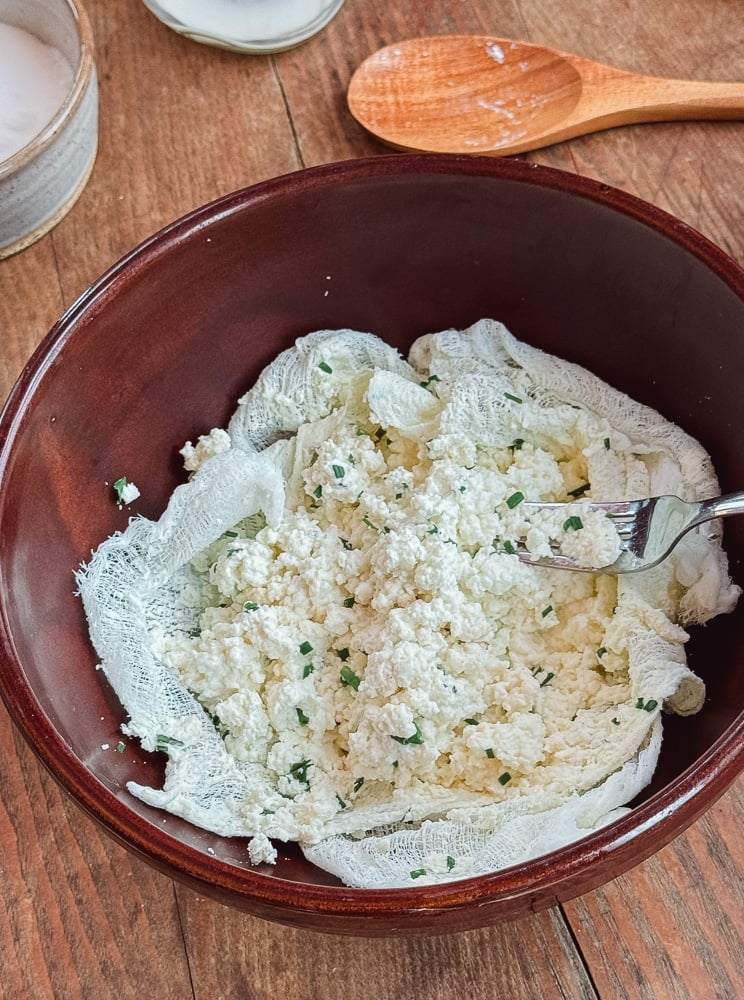
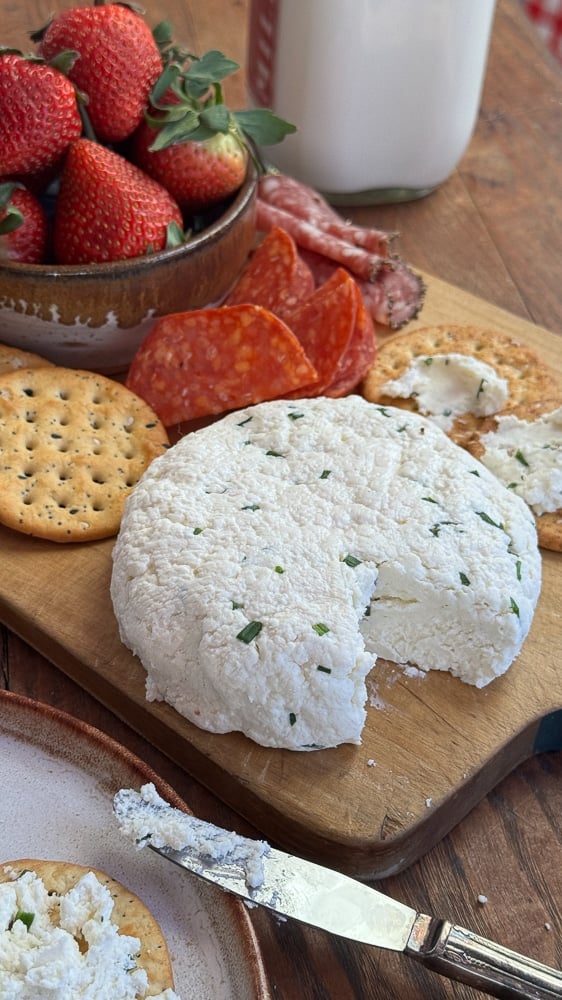
Once the curds are strained and salted, you have a choice. You can keep the cheese loose and crumbly… the way you’d use ricotta, spooned over things, stirred into things, eaten straight from a bowl with a fork. Or you can press it into a round, wrap it tight in the cheesecloth, set a plate on top, and let it chill for an hour in the refrigerator. What comes out is a small, firm wheel you can slice, set on a board, serve to company without apology.
Both are right. It just depends on what you’re making it for.
On Keeping
Farmer’s cheese is meant to be eaten soon. It will keep, refrigerated in an airtight container, for four or five days, though in my experience it rarely makes it that long. If the curds begin to dry out, stir in a spoonful of the reserved whey or a small splash of milk and it comes right back.
And do save the whey. Use it in place of water when you bake bread. Stir it into soup. Give it to the chickens. Nothing from this process needs to go to waste.
Fresh Homemade Farmer’s Cheese
Ingredients
Equipment
Method
- Pour the milk into a large, heavy-bottomed pot and heat over medium to medium-low, stirring occasionally to prevent scorching. Heat until small bubbles form around the edges and the milk is steaming and very nearly at a boil – around 190°F if you’re using a thermometer. Remove from heat.
- Pour in the vinegar and stir gently. The milk will begin separating into curds and whey within moments. Give it one slow stir, then set it aside and let it rest, undisturbed, for 15 minutes.
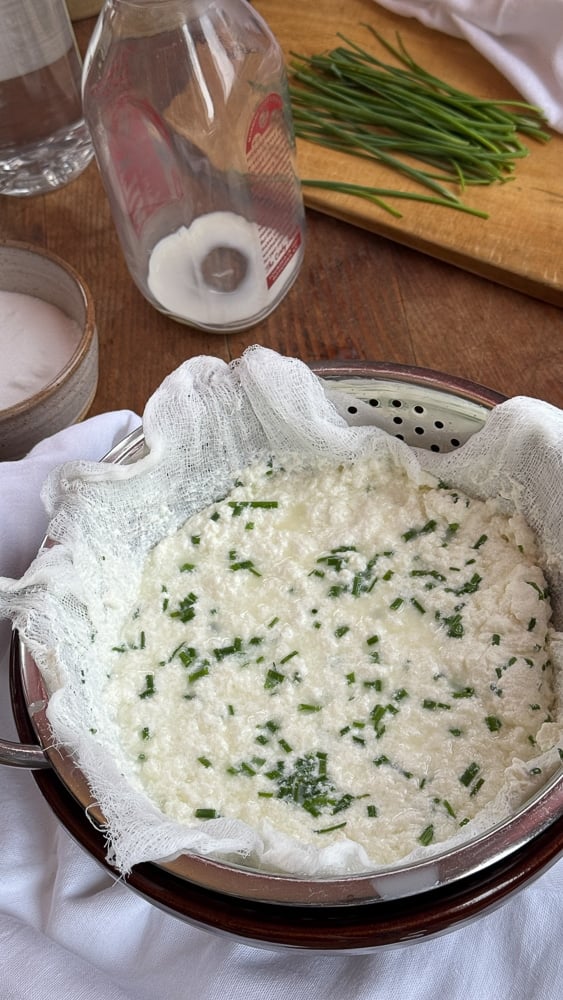
- While the curds rest, line a colander with a double layer of dampened cheesecloth and set it over a large bowl.
- If you’re adding herbs, stir them gently into the curds now.
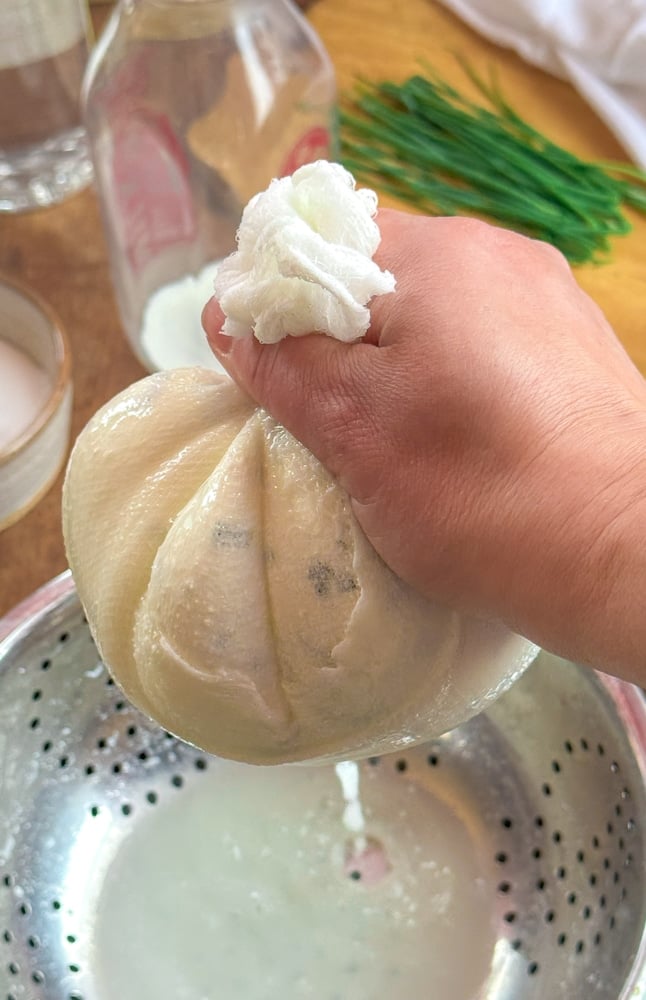
- Ladle the curds and whey into the cheesecloth-lined colander. Let it drain for a few minutes, then gather the cloth around the curds and squeeze gently. Press more firmly for a crumblier cheese; leave more moisture in for something spreadable.
- Transfer the curds to a bowl, stir in the salt, and taste. Add a spoonful of reserved whey if the cheese seems drier than you’d like.
- To serve loose: transfer to a bowl and use immediately, or refrigerate.
- To shape into a wheel: keep the curds in the cheesecloth and press into a round mound on a plate. Set a second plate on top and press gently to form a disc about 1 to 1½ inches thick. Refrigerate, still wrapped, for at least one hour before unwrapping and serving.
Notes
Tried this recipe?
Let us know how it was!