Get a Head Start on Spring with Winter Sowing


If you are itching to start gardening, winter sowing, a simple and fun gardening technique, that lets you to start your spring garden in the heart of winter. Yes, even in the middle of a cold dark winter, your garden can begin its journey toward springtime splendor.
Today I am going to walk you through the essentials of winter sowing. From choosing the right containers and seeds to the thrill of seeing the first sprouts emerge from the snow, we’re here to guide you every step of the way. So, cozy up with a warm drink, and let’s delve into winter sowing, turning the cold days ahead into a foundation for a vibrant spring garden.
Understanding Winter Sowing
Winter sowing is a great way to start seeds as it mimics the process many seeds undergo in the wild, where they fall to the ground in autumn, endure the winter cold, and then sprout with the arrival of warmer spring temperatures. Resourceful gardeners who want to utilize mother nature to get a jumpstart on the growing season adapted this method for gardening.
Winter Sowing is not a new technique, but it was popularized by Trudi Davidoff, a thrifty gardener, who was challenged for space in her small New York State Home. She did not have room for grow lights, heat mats, and seed trays, so she decided to mimic what happens naturally. She sowed seeds in containers in late winter and left them outdoors to germinate naturally, without supplemental water or fertilizers. The technique was a success, and Trudi spread the word through a now defunct website and Facebook group (Winter Sowers), which is very active and a great resource!.
- The Science Behind the Method: Winter sowing works because it relies on the natural stratification process. Many seeds, known as cold stratification, require a period of cold temperatures to break their dormancy. By sowing seeds in containers outdoors during winter, they naturally undergo this chilling period. As the temperatures warm, the seeds germinate in sync with the optimal growing conditions. This method also reduces the need for artificial heating and lighting systems, making it an eco-friendly and cost-effective approach to gardening.
- A Contrast to Traditional Sowing: In traditional sowing, seeds are often started indoors under controlled conditions, requiring careful monitoring of temperature, light, and moisture. While this method has its merits, it can be labor-intensive, require a lot of space, and sometimes leads to weaker seedlings due to lack of exposure to natural elements. Winter sowing, on the other hand, allows seedlings to acclimate to their natural environment from the start. They tend to be hardier and more resistant to pests and diseases. Moreover, winter sowing simplifies the process by eliminating the need for transplant shock, as seedlings are already growing in the medium they will continue in.

Getting Started with Winter Sowing
Embarking on your winter sowing adventure is exciting, but it can seem overwhelming, but I promise you, it’s not hard, actually I think it is a great way do a little gardening before you typically can. You’ll need a few essential supplies, and a touch of planning. Let’s walk through the essentials to get you started on this rewarding path.
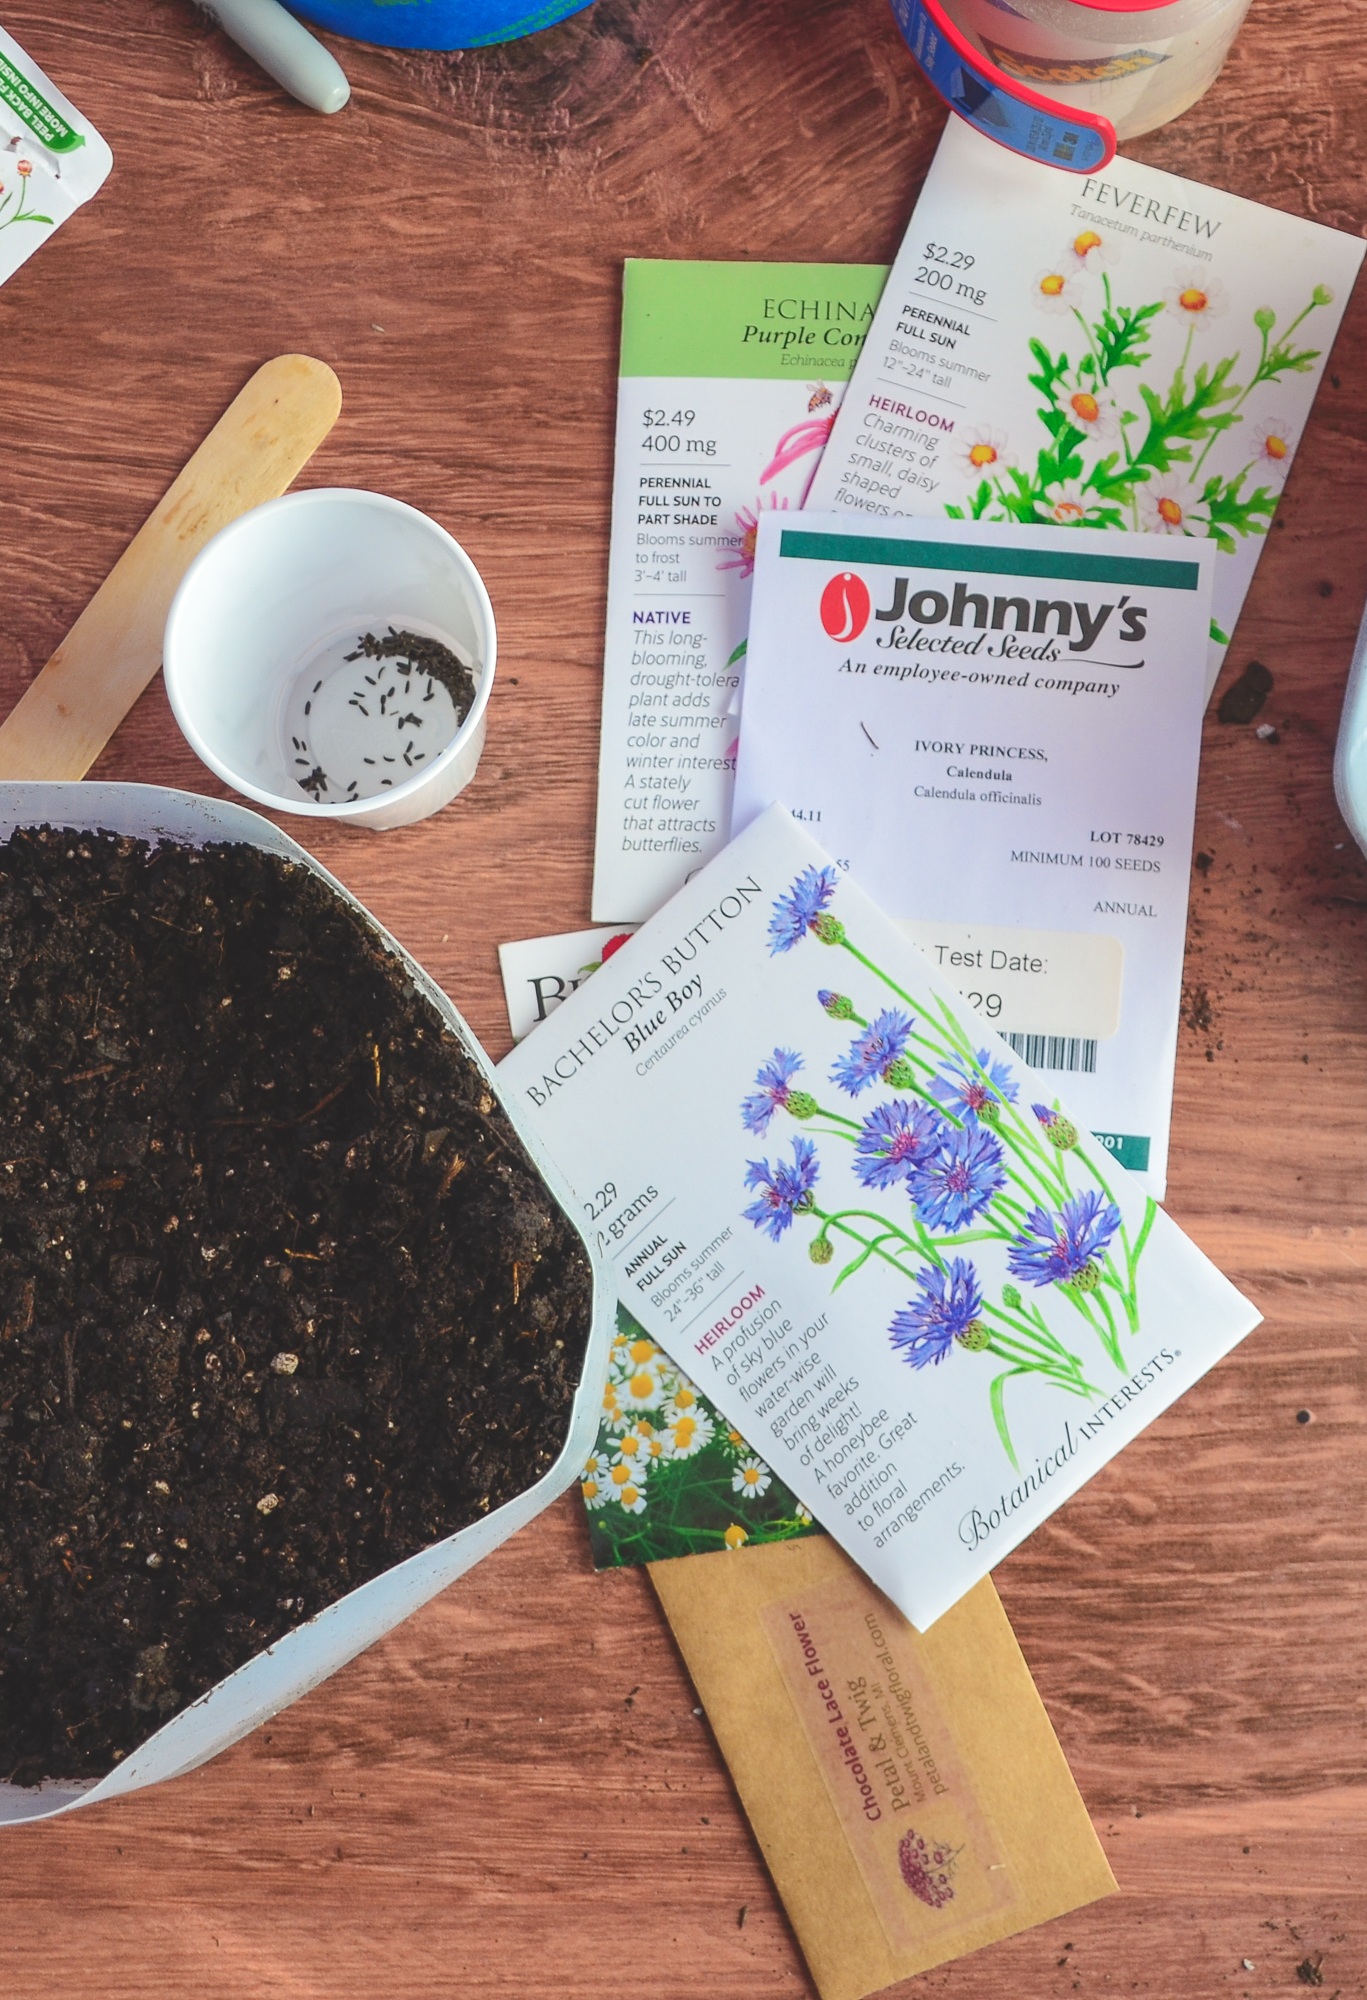
Essential Materials for Winter Sowing:
You don’t need much for winter sowing and I love that the containers you will use are usually available for free.
- Containers: Translucent containers such as milk jugs, water jugs, vinegar jugs, or any plastic containers with lids tend to work best. These will act as mini greenhouses for your seeds. Consider asking your friends and neighbors to set their milk jugs aside for you, I have found people are generally happy to!
- Duct tape or other strong tape: After cutting and sowing seeds in your repurposed containers, duct tape is used to seal them back together securely. This helps maintain the mini greenhouse environment necessary for germinating seeds.
- Soil: A good quality potting mix is essential. It should be well-draining yet able to retain enough moisture. I have some more thoughts about this below.
- Seeds: Choose seeds suitable for your climate and the season, also, more about this below.
- Water: To moisten the soil and aid germination.
- A Sharp Tool: For making drainage holes in your containers.
- Labels and a Permanent Marker: To keep track of what you’ve planted.
Choosing the Right Seeds:
Selecting seeds for winter sowing is an exciting part of the process. The right type of seeds for winter sowing are often hardy annuals, perennials, herbs, and vegetables that are known to endure cold climates. Some seeds are specifically labeled as suitable for winter sowing. Remember, the goal is to mimic nature, so choose seeds that naturally require a period of cold to germinate, these often include native seeds,. Look for these terms on seed packets:
- reseeding
- self-sowing
- hardy seeds
- seedlings can withstand frost
- sow outdoors in late autumn or early winter
- sow outdoors in early spring while frosts may still occur
- needs pre-chilling
- requires stratification.
If you are looking for a more detailed list, check out my post Selecting Seeds for Winter Sowing

Choosing the Right Soil
- Well-Draining Soil: For winter sowing, it’s crucial to use a soil mix that drains well. Excess moisture can be detrimental in the cold months, as it can freeze and damage seeds or young plants.
- Low Nutrient Content: Seeds don’t require a lot of nutrients to germinate. A soil mix with low nutrient content is often recommended for starting seeds. Once the seedlings are established, they can be transplanted into a richer soil.
- Sterile Mix: Using a sterile soil mix can prevent the growth of mold and fungi, which are more prevalent in the cooler, moist conditions of winter.
- Organic Options: If you prefer organic gardening, look for soil mixes that are certified organic. These will be free from synthetic fertilizers and pesticides.
Popular brands often have specific mixes of potting soil. Brands like Miracle-Gro, Jiffy, FoxFarm, and Espoma are well-regarded in the gardening community and offer a variety of soil mixes that could be suitable for winter sowing.
Soil choice happens to be one of the most confusing and debatable issues for winter sowing. Everyone has their own preference, but I like Happy Frog. It is available right at my local farm and garden store, I have had good luck with it, and I can use it for later when I am transplanting vegetable seedlings. Don’t overthink it, or let it be a road block for trying winter sowing.
Preparing Your Containers
- Cleaning: Begin by cleaning your containers thoroughly to prevent any disease or mold, especially if they are plastic milk jugs, that may have a little bit of residual milk that may encourage mold growth. I clean mine in the kitchen sink with a sponge and some regular dish soap, after I have made my cut to “open up” the jug
- Opening up the Jug and Creating Drainage Holes: Use a sharp tool to make drainage holes at the bottom of the container. This is crucial for preventing water-logging. After you have poked drain holes, cut around the perimeter of the jug. Starting around the base of the handle, begin to cut the jug horizontally across, stopping short to leave a 3-inch connected segment which will act as a flap, allowing you to easily open and close your miniature greenhouses.

The Sowing Process
With your seeds and containers ready, it’s time to embark on the heart of winter sowing. This section will guide you through when to start, how to sow your seeds effectively, and how to keep everything organized for springtime success.
Timing Your Sowing Based on Climate Zones:
A good rule of thumb for winter sowing is to start sometime after the winter solstice when days slowly begin to lengthen. This timing aligns well with the natural growth cycle of many plants. Depending on your climate zone, the ideal time to sow seeds can vary.
- Colder Climates (Zones 1-5): Begin winter sowing when you experience your first consistent freeze, typically from late December to January.
- Moderate Climates (Zones 6-7): You can start a bit later, usually in January or early February, as your winters are less severe.
- Warmer Climates (Zones 8-9): In these areas, late winter or very early spring (February or March) is ideal, as you experience milder winters.
Remember, the essence of winter sowing is to mimic natural conditions, so don’t worry about getting the timing perfect. Nature has a way of balancing things out.
Step-by-Step Instructions on Sowing Your Seeds:
- Moisten The Soil: I prefer to place my soil in a small feed trough and moisten it right there. I use a watering can to mix water into the soil until I am happy with the moisture level. The ideal moisture level for the soil is crucial; it should be damp enough to hold together when you grab a handful and squeeze, but not so wet that it becomes soggy The feed trough also allows me to easily fill the containers with soil directly from the trough while keeping any mess to a minimum.
- Fill Containers with Soil: Fill your pre-prepared containers (with drainage holes) with 3-4 inches of moist potting soil.
- Sowing the Seeds: Scatter the seeds over the soil surface. For larger seeds, you may plant them individually. Follow the seed packet instructions for specific planting depth.
- Cover the Seeds: Lightly cover the seeds with soil if required. Some seeds need light to germinate and should not be covered. Follow the directions on the packet.
- Seal the Containers: Close the lids or cover your containers. If using cut-open jugs or bottles, tape them closed to create a mini greenhouse.
- Place Containers Outdoors: Set your containers outside in a spot that’s exposed to weather but protected from harsh winds or nosy chickens or pets.
Labeling and Organizing Your Containers:
- Label Clearly: Use waterproof labels or a permanent marker to write the plant name and sowing date on each container.
- Tracking Varieties: If you’re sowing multiple varieties of the same plant, number or code them for reference.
- Record Keeping: Maintain a simple garden journal or a spreadsheet with details of what’s planted in each container, sowing dates, and any observations.
Organizing and labeling your containers not only help in keeping track of your plants but also makes the process more enjoyable. You’ll love seeing the names and anticipated sprouting dates, adding to the excitement as you watch for the first signs of growth.

Caring for Your Winter Sown Seeds
Now that your seeds are snugly sown and braving the winter elements, it’s time to focus on caring for them. This part of winter sowing is mostly about monitoring and waiting, with nature doing much of the heavy lifting. Let’s explore how to best care for your seeds during this period.
Watering and Monitoring Your Seeds:
- Watering: One of the beauties of winter sowing is that the snow and rain will generally provide the moist conditions seeds need. However, on warmer or windier days, check your containers. If the soil looks dry, gently water it to keep the environment moist.
- Monitoring: Keep an eye on your containers, especially as the spring approached and the season transitions from winter to spring. Look for signs of condensation inside the containers, which indicates a good moisture level.
Dealing with Common Issues:
From managing moisture levels to protecting seeds from pests, each challenge requires attention and care. But don’t worry, solutions are at hand! For more detailed insights, be sure to check out my post on ‘10 Winter Sowing Mistakes & How To Avoid Them.’ This guide is designed to help you identify and rectify common pitfalls, ensuring your winter sowing journey is as smooth and successful as possible.
- Pests: The closed container environment helps protect seeds from common pests. However, be vigilant and check occasionally for signs of insects or rodent damage.
- Mold: If you notice mold, it often means too much moisture. Open the containers for a few hours on a dry, sunny day to let excess moisture evaporate.
- Temperature Fluctuations: On unusually warm winter days, you might need to open the containers to prevent overheating. Conversely, ensure your mini-greenhouses are securely closed during a late cold snap.
Transitioning Seedlings Outdoors:
- Timing: The right time to transition your sprouts depends on the plant type and your local weather. Generally, once the seedlings have a couple of sets of true leaves, they’re ready.
- Transplanting: When seedlings are strong enough, you can transplant them into your garden. Be gentle with their delicate roots during this process.
Caring for your winter-sown seeds is a lesson in balance and observation. It’s about giving your plants the right environment to thrive, but also trusting in the natural process. As you watch the first green shoots push through the soil, you’ll feel a connection to the cycle of growth and renewal that makes gardening so rewarding.
Tips for Transplanting and Ongoing Care:
- Transplanting: When it’s time to move your plants to their final location in the garden, choose a cloudy day or late afternoon to minimize stress. Make sure to water them well after transplanting.
- Soil Health: Healthy soil is the foundation of a thriving garden. Consider adding compost or organic matter to enrich the soil around your new plants.
- Watering: Regular watering is crucial, especially in the weeks after transplanting. However, avoid overwatering – plants need to develop strong root systems.
- Mulching: A layer of mulch around your plants can help retain moisture, suppress weeds, and add nutrients to the soil as it breaks down.
Enjoy and Learn from the Process:
- Observation: Take time to observe the changes in your garden. Watch how your plants react to different conditions and learn from them.
- Record Keeping: Keeping a garden journal can be a delightful way to track your progress, note what works, and plan for future seasons.
- Sharing and Community: Share your experiences with fellow gardeners. Gardening communities are great resources for advice and encouragement, whether local or online.
Remember, gardening is as much about the journey as it is about the results. There will be successes and challenges, but each provides an opportunity for learning and growth. As your winter-sown plants take root and flourish, take pride in knowing that you got an early start and nurtured them from seed through the quiet cold winter months,